This small tutotorial will guide you through the import of some cars, it should work for any car but I’ll be using “Kenney’s Mini Car Kit”. You can download it here:
https://kenney.itch.io/kenney-game-assets-3
I’ll be using Maya, but it shouldn’t really matter if you use Blender or 3ds Max.
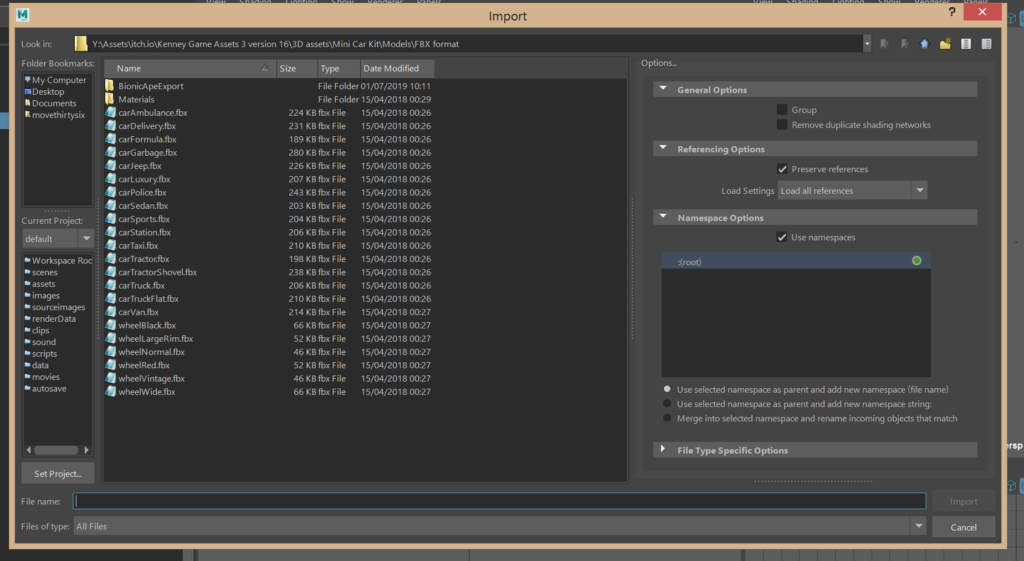
Unreal Engine uses centimeters so it’s a good practice to set up our environment to use centimeters as well. After doing that we import our vehicle’s fbx file:

First thing we noticed is that the transform is terrible wrong:
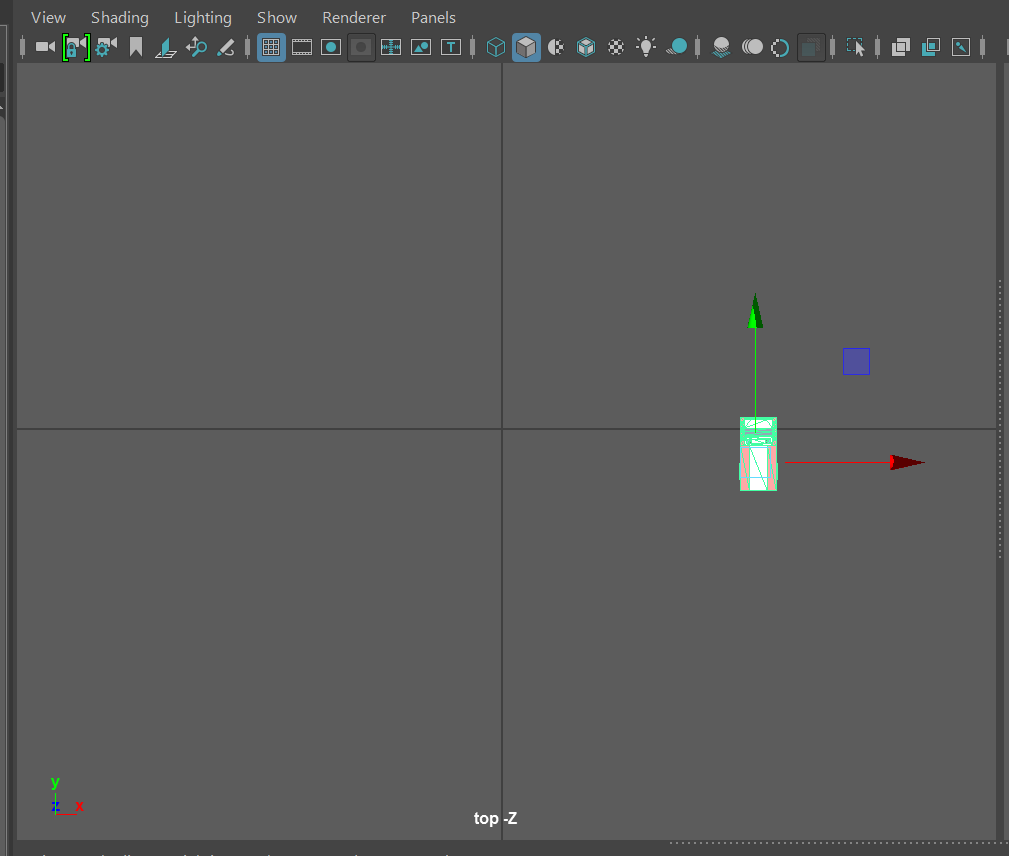
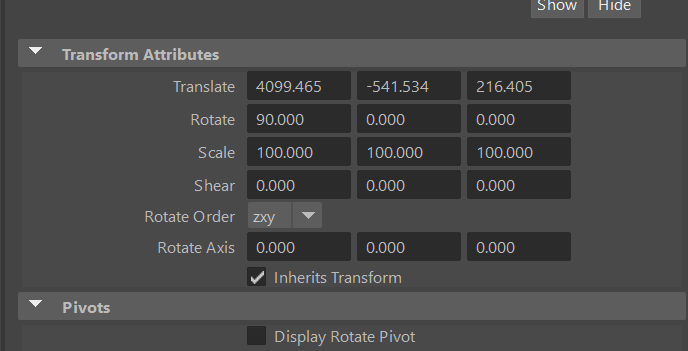
So is the pivot:
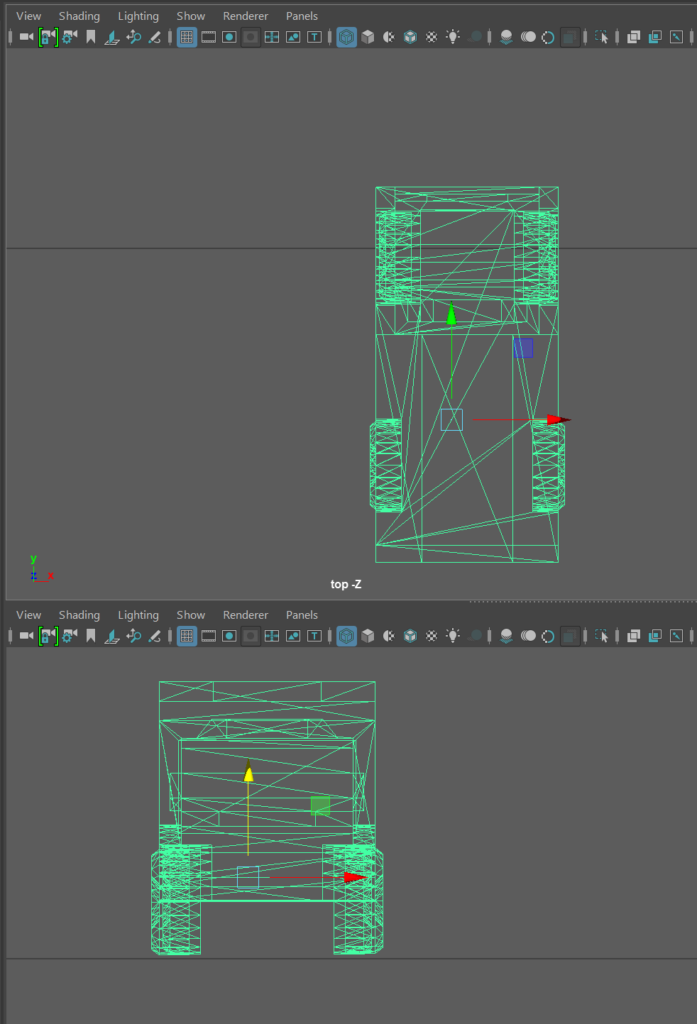
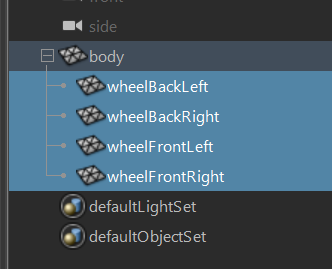
But first we parent all the wheels to the body and we set the body as the root.
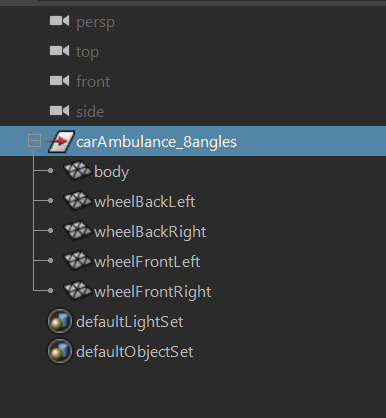
Like this:
Try to adjust the Scale, for doing that google the dimensions of your car, and try to adjust the scale to that dimensions.
Import your model to Unreal Engine. Drag and drop into your content folder:
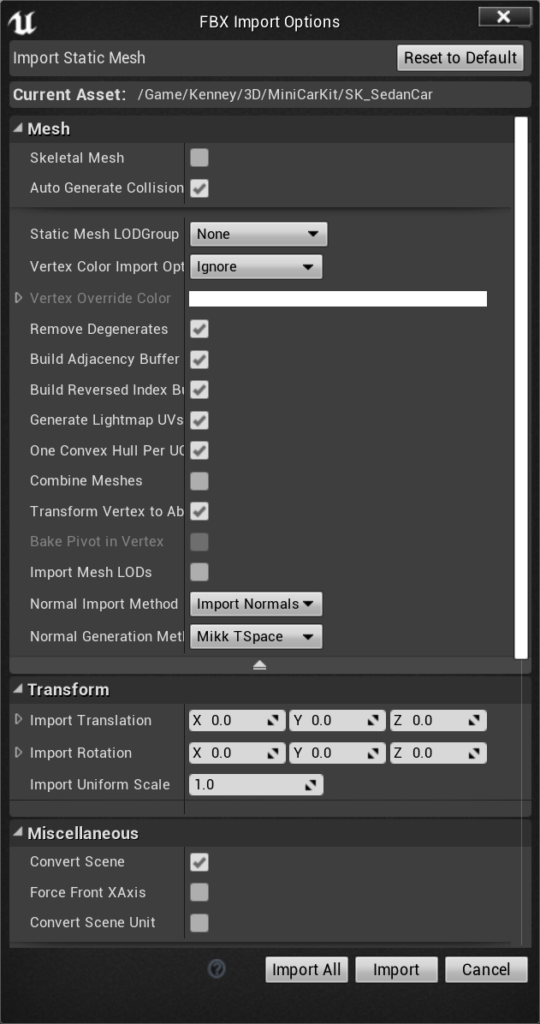
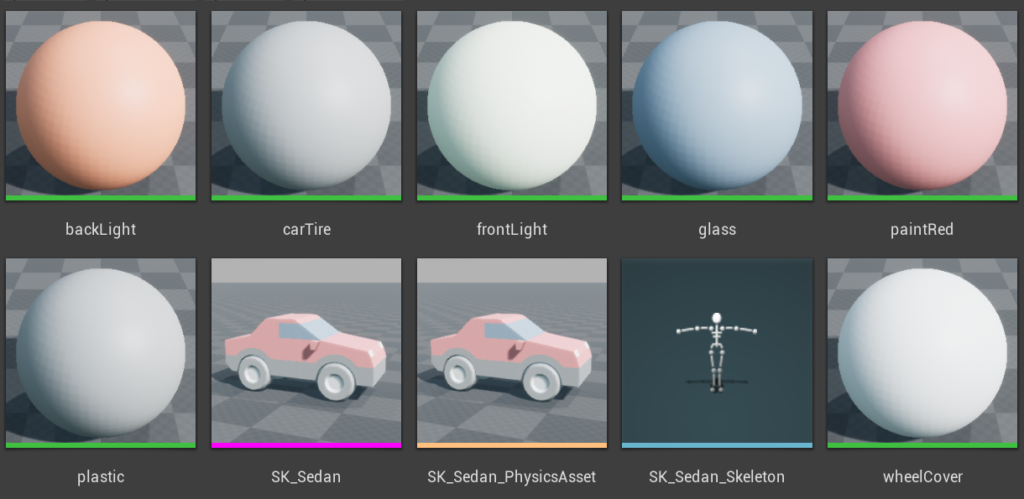
After that, Unreal Engine will create a number of Materials, a Skeletal Mesh, a Physics Asset and a Skeleton.
Now open your Physics Asset and delete all the bodies:
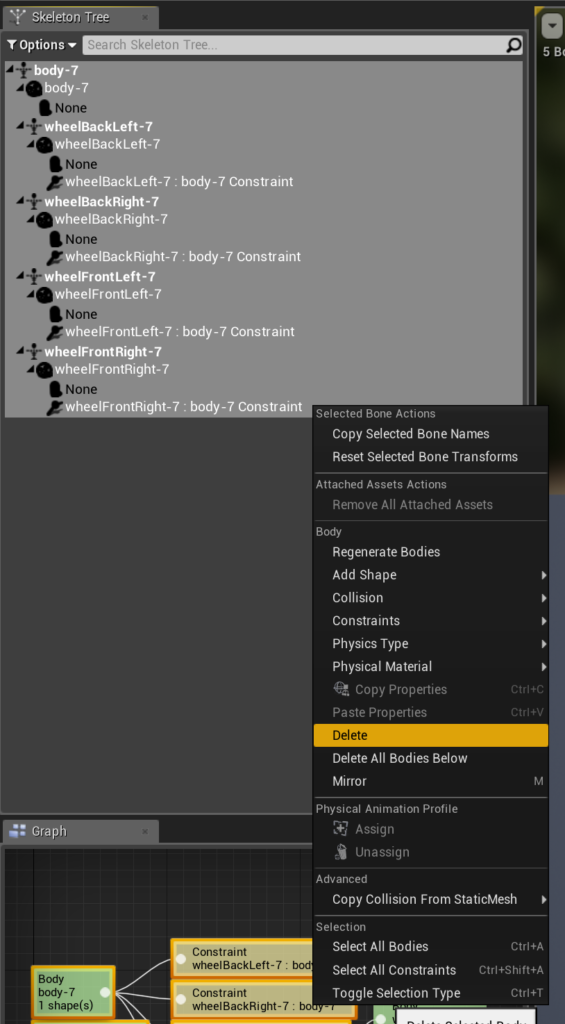
Right click on the Body bone and select “Add Shape” and click on “Add Box:
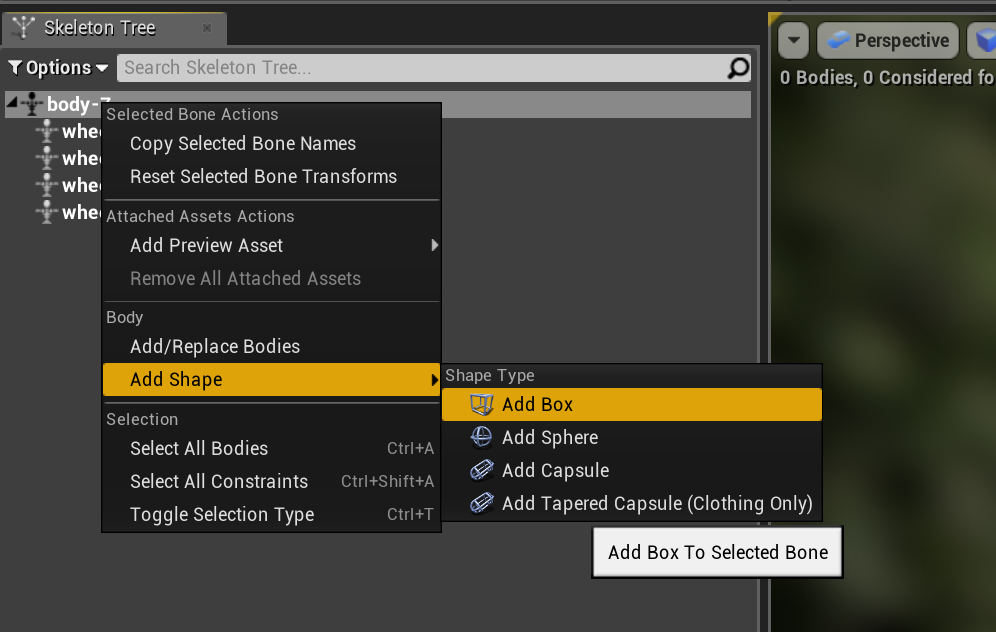
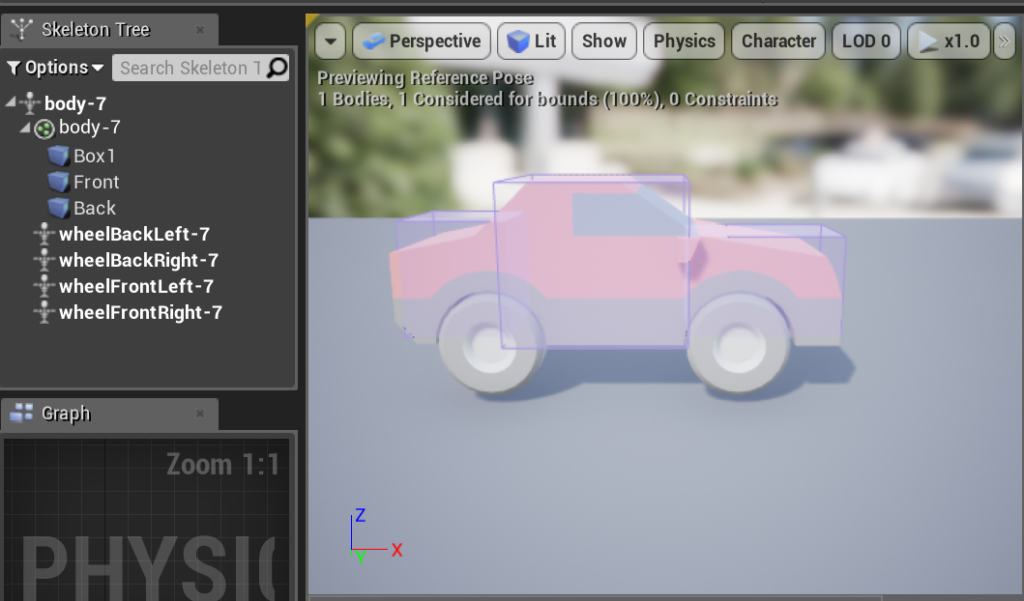
You can add as many Shapes as you want to fit your model, I have added three and then, change the scale and the location to fit the model, this is the result:
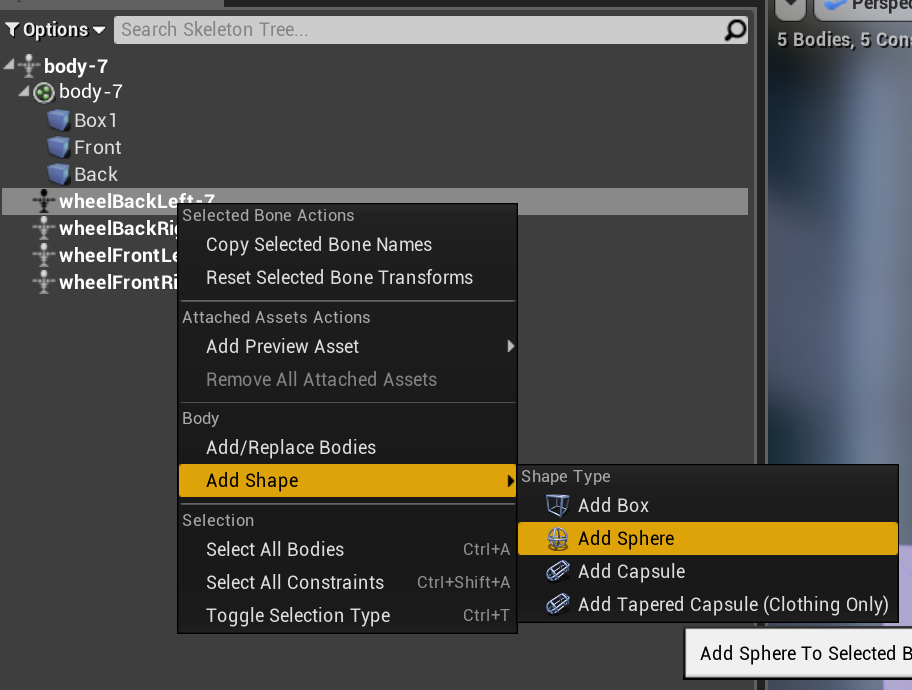
Add a Sphere Shape to each Wheel:
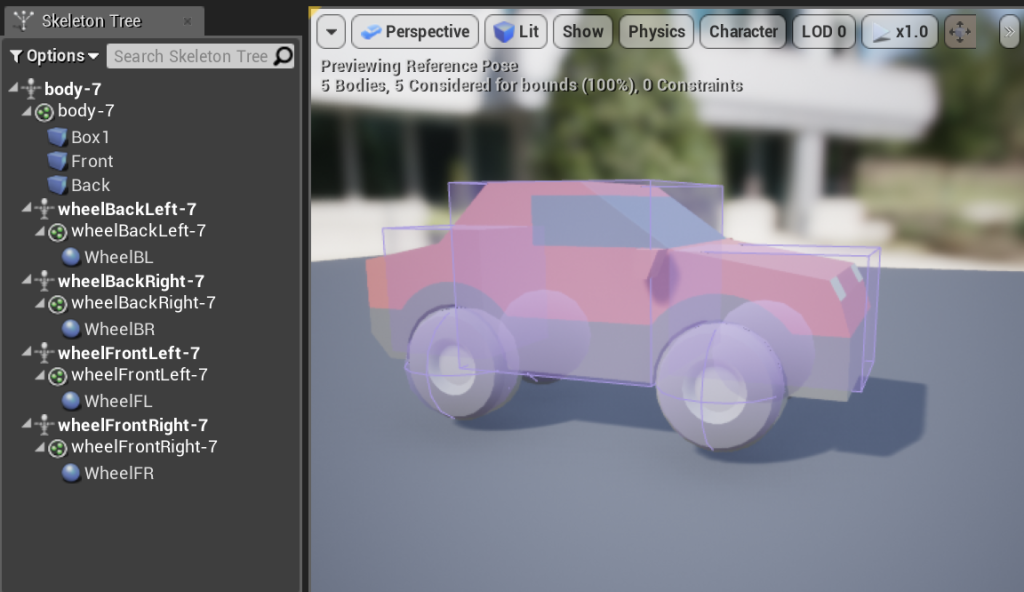
And Scale them, the end result should be something similar to this:
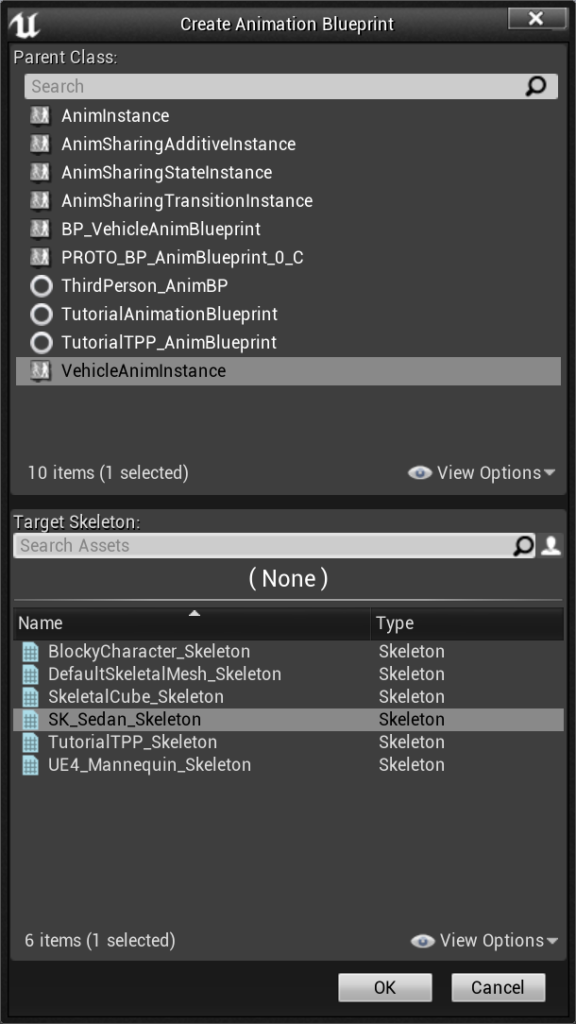
Now let’s go to our Content Browser, create a subfolder and name it “Blueprints”, now right click inside and click on “Animation”->”Animation Blueprint”. A new window will pop up, choose “VehicleAnimInstance” as Parent Class and the recently created skeleton (mine SK_Sedan_Skeleton). Name it and open it. I named it BP_VehicleAnimBlueprint.
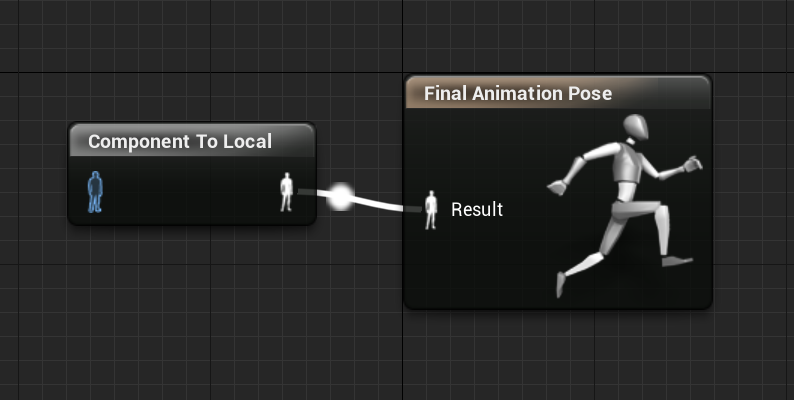
After opening your created Animation Blueprint, go to your Anim Graph. Right click on an empty space and type “component to local” Click on the option and link the output to input of “Final Animation Pose”.
Right click again on an empty space and type “wheel handler” create the node and plug it to the input of “Component to Local”. Finally, right click on an empty space and type “mesh space ref pose” click on the option and link all the nodes like this:

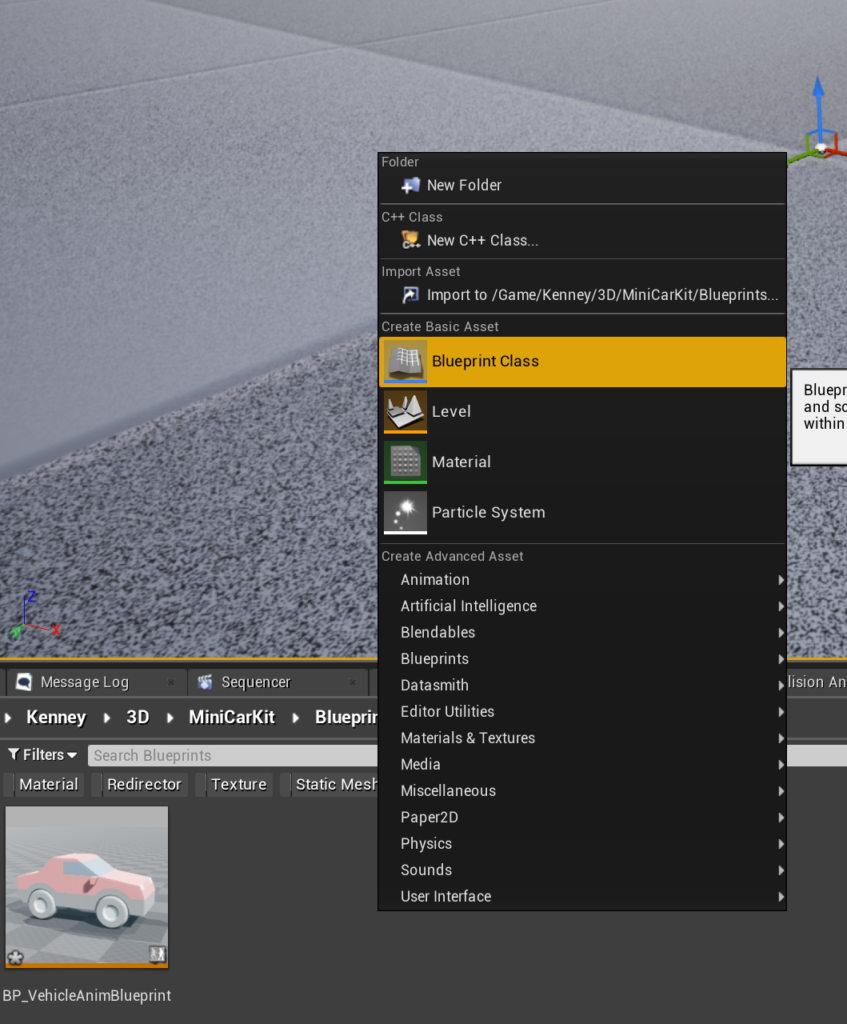
Now go back to your Content Browser, go to your folder and right click on an empty space. Select “Create Basic Asset”->”Blueprint Class”
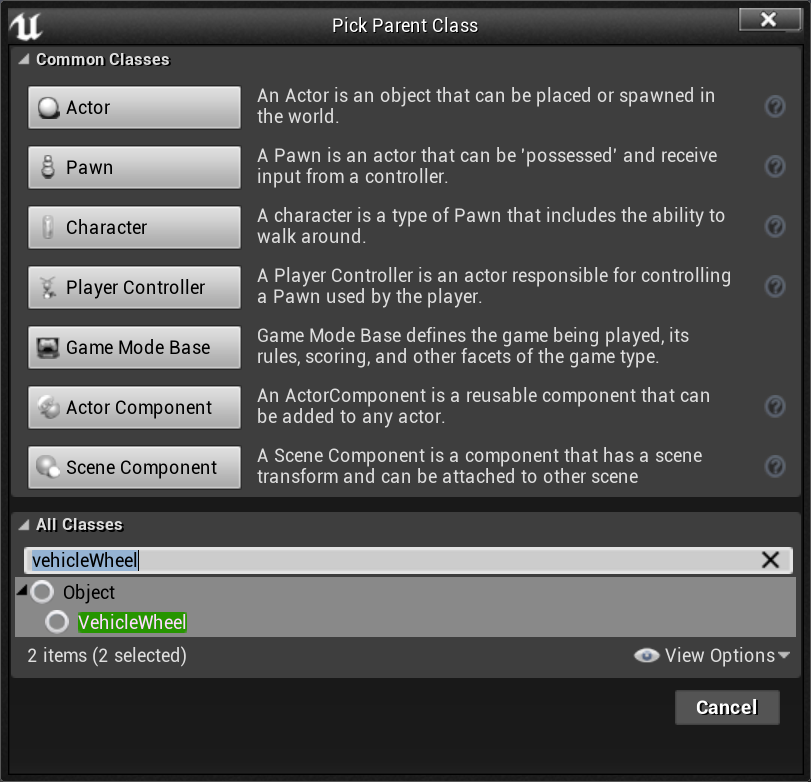
Type “VehicleWheel” and click on the green Button. Name the new Blueprint “BP_FrontWheel”. Duplicate it or repeat the last step and name it “WB_RearWheel”.
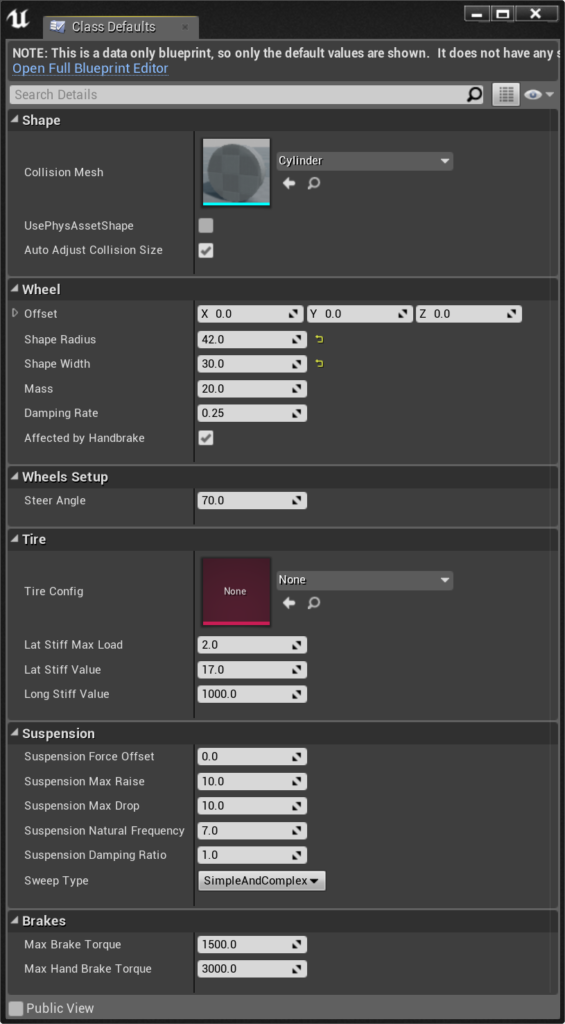
Now we need to configure both wheels, to do that, we need to measure the wheel of our car. To do that, you can place the model in the level, choose any orthographic view and then use the middle mouse button to measure the width and the radius of the wheel, our 4 wheels have the same size and is 44 radius and 30 width. Inside this class you can find multiple variables including the steer angle, the tire type, the suspension, brakes and if it’s affected by the handbrake. My front wheel configuration looks like this:

And the rear wheel looks like this (notice the only change is the “affected by handbrake” value):
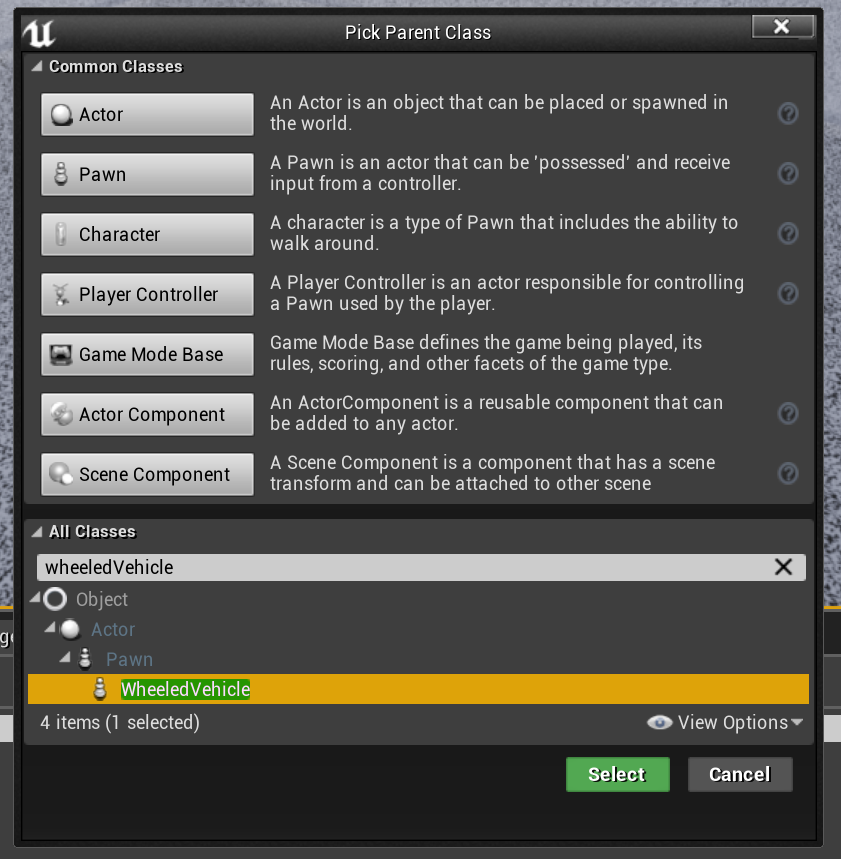
Now go back to your Content Browser, go to your folder and right click on an empty space. Select “Create Basic Asset”->”Blueprint Class” and type “WheeledVehicle” click on the class under Object->Actor->Pawn and click on the green button “Select”.
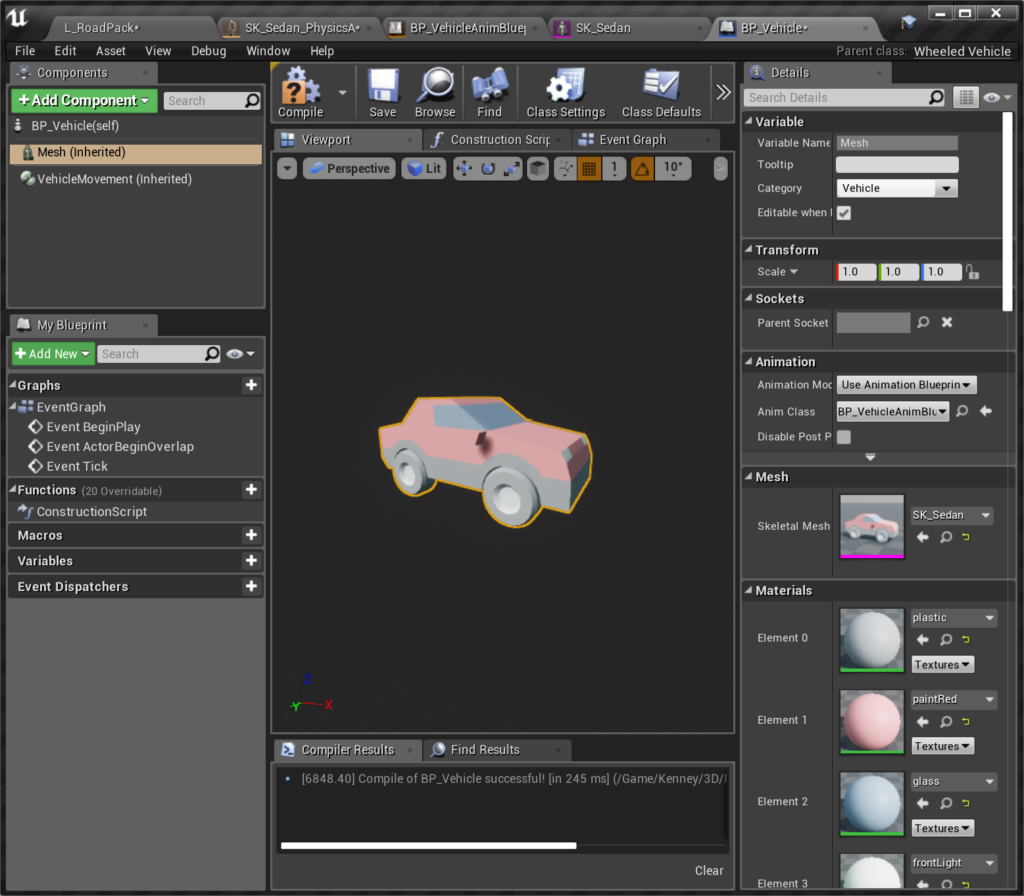
Name your new Blueprint BP_Vehicle and double click on it to open it. Go to your components tab and select Mesh, then on the details panel you will see an option under Mesh called “Skeletal Mesh”. Click on it and select your recently created Skeletal Mesh. And under “Animation->Anim Class” select your Animation Blueprint (BP_VehicleAnimBlueprint). After that it should look like this:
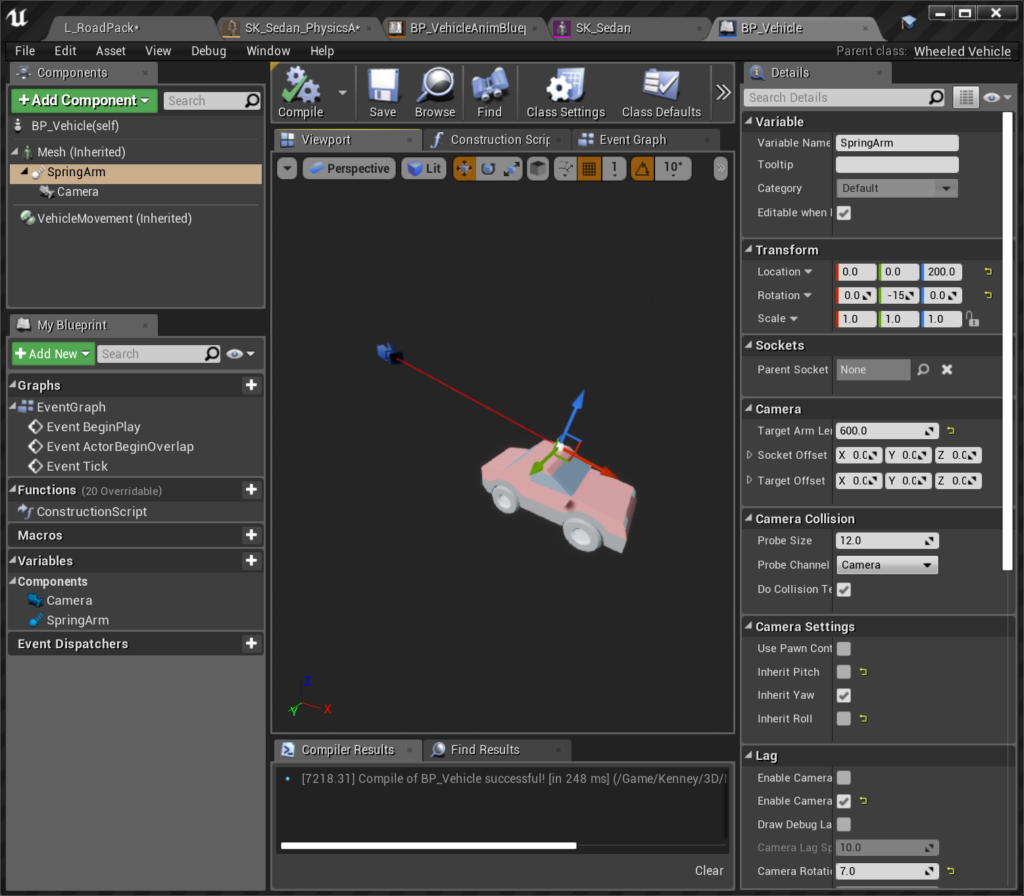
Under the Components tab, click on “+ Add Component” and Select Spring Arm Component, set a location of (X=0.000000,Y=0.000000,Z=200.000000) and a Rotation of (Pitch=-15.000000,Yaw=0.000000,Roll=0.000000) or set your own values if you prefer. Click on “+ Add Component” again and choose Camera Component and attach it to the Spring Arm.
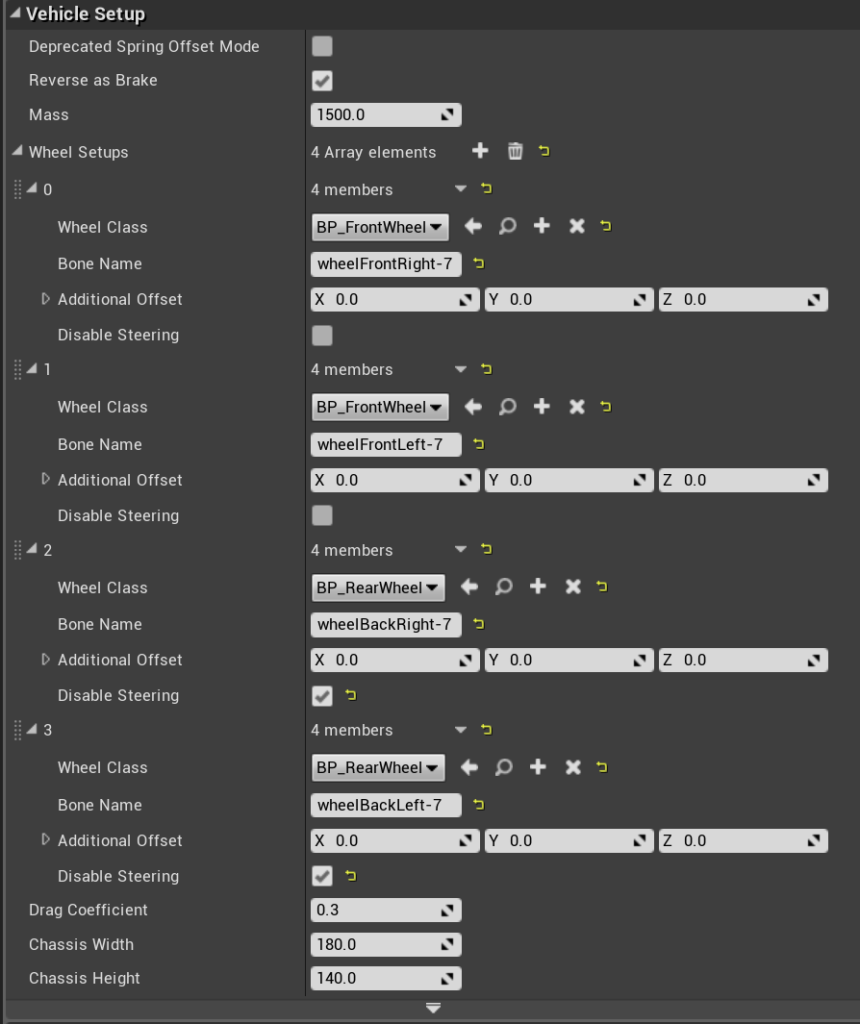
Click on Components->VehicleMovement and setup your wheels. You will need to set the Blueprint Classes that we created, set if they will steer (in our case only front wheels), and the Bone Name. Mine look like this:
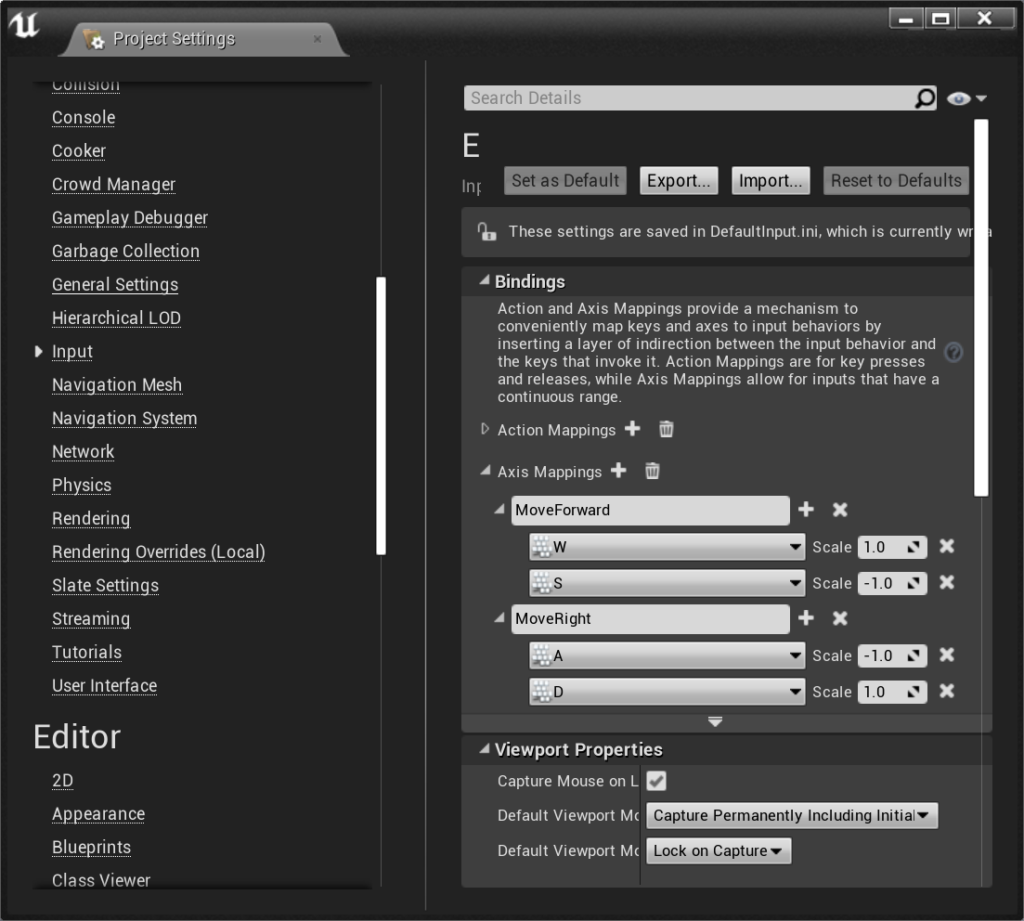
Now we need to bind our input, for that go to your Project Settings and under Input find “Bindings->Axis Mappings” press the “+” button and add the following inputs:
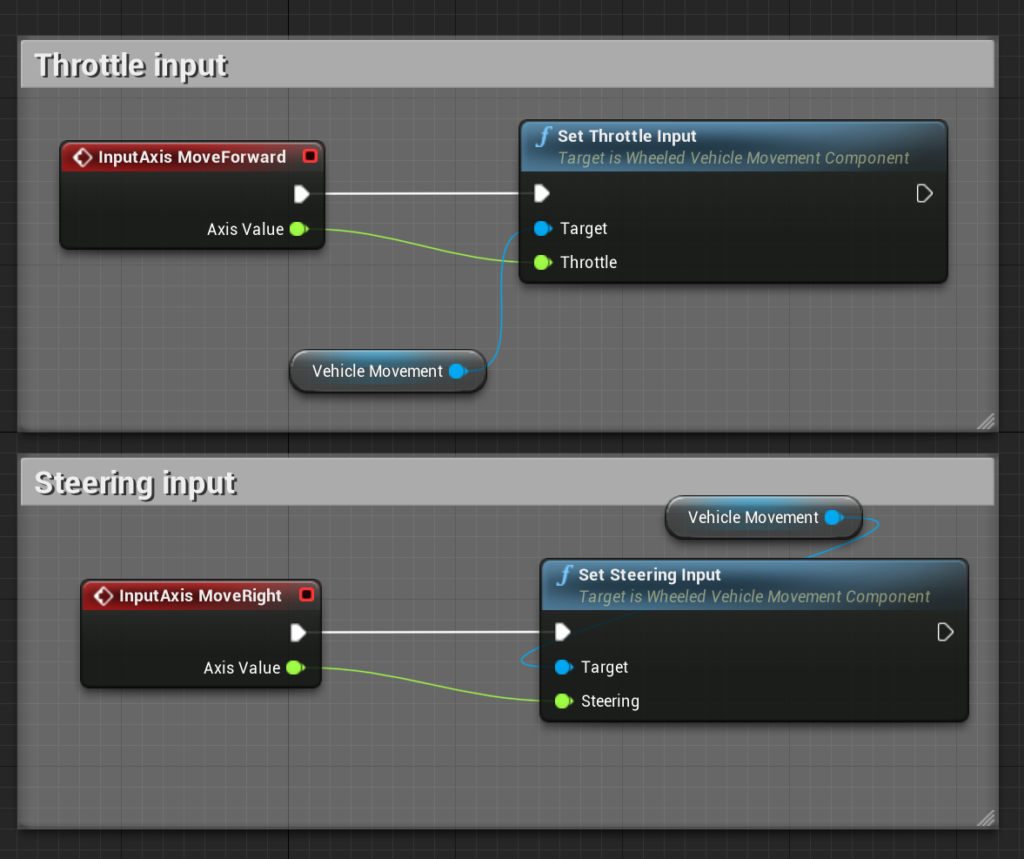
Now, go back to your BP_Vehicle and select the “Event Graph” tab. Click on an empty space and create the following nodes:
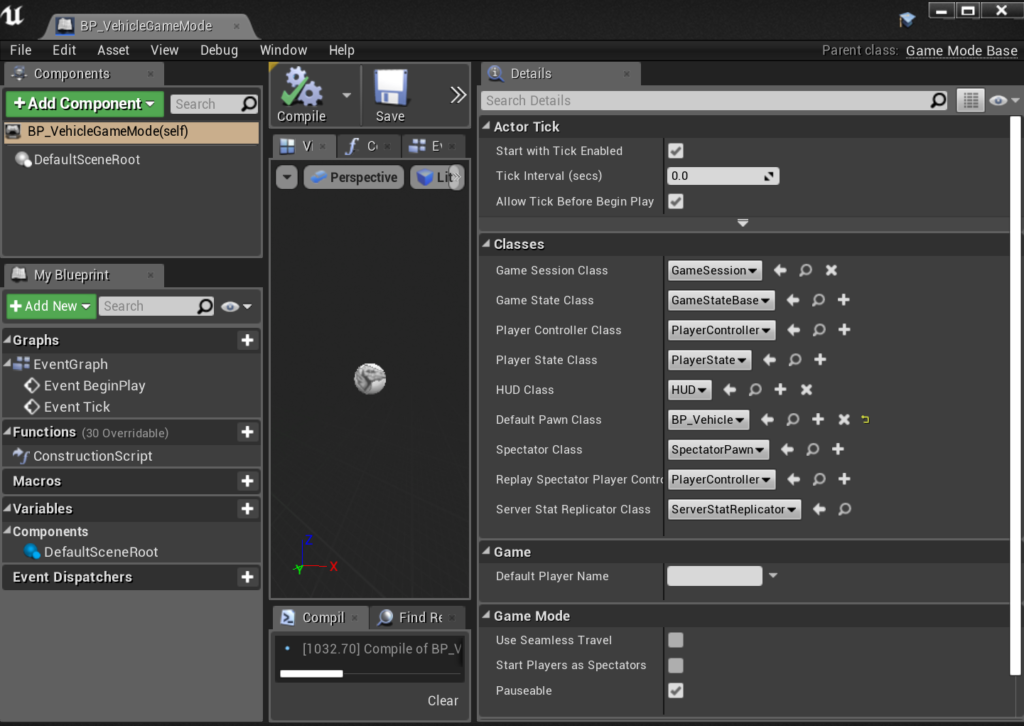
We go back to our Blueprint folder in the Content Browser, right click in it and Create a new Blueprint. Then select Game Mode Blueprint and name it BP_VehicleGameMode. Open it and change the default Pawn Class to BP_Vehicle.
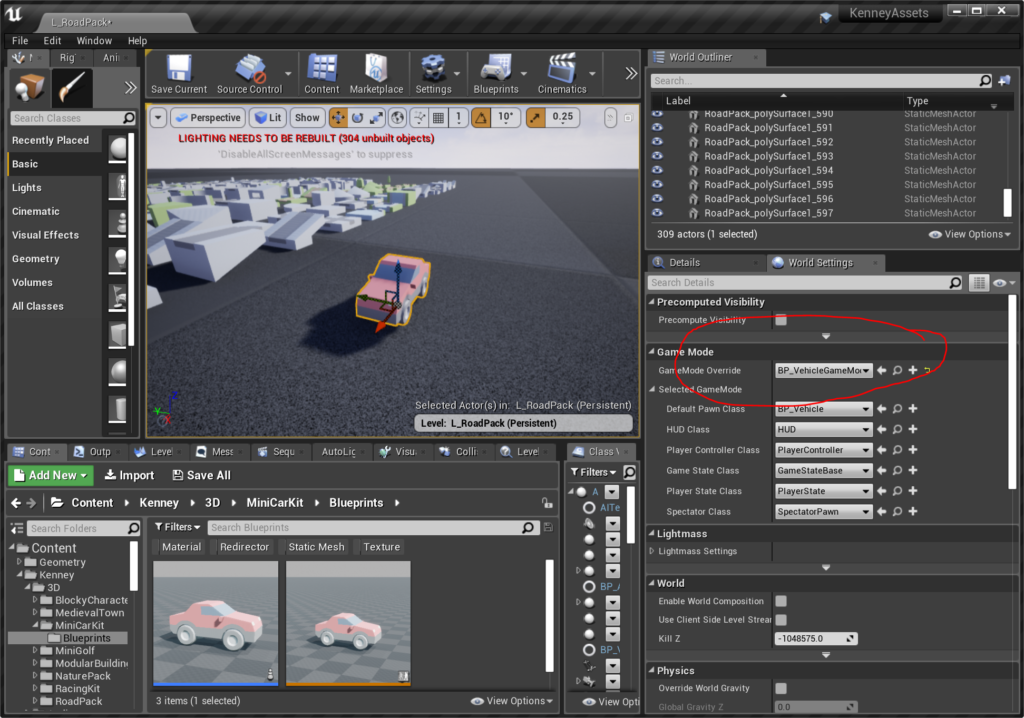
Now go to your World Settings Tab and choose BP_VehicleGameMode under GameMode Override.
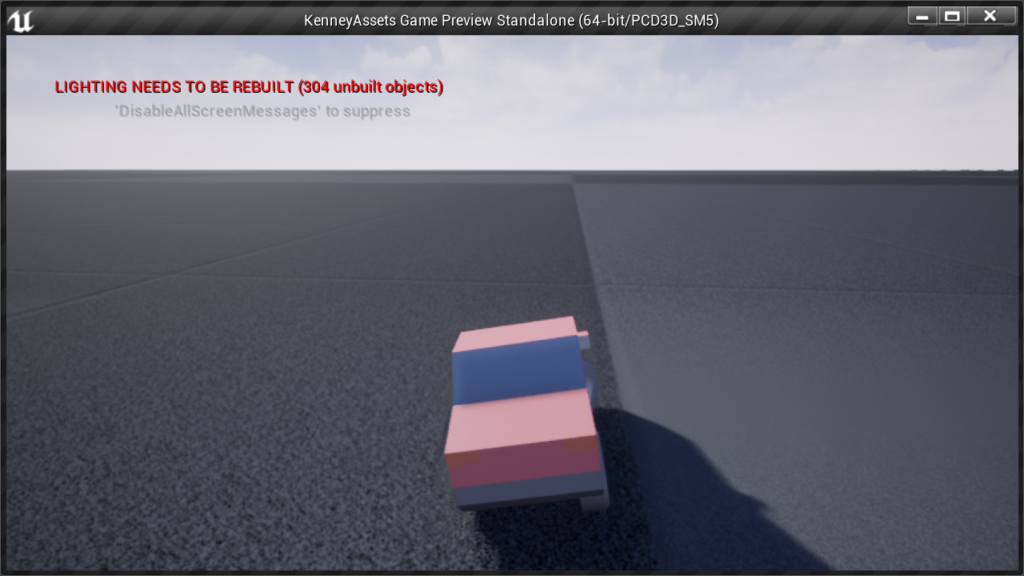
Now you can press play and test that everything worked:
